.
How to take panoramic images with your camera- the easy way
I know phones have a setting to create panoramic images but what if you wanted to create one with your camera. Today I will be explaining how to do just that, along with how to edit it on Lightroom.
You actually do not need much:
- Tripod
- Camera
- Lens.
Method:
- Choose a central spot to place your tripod so you can move it 360 degrees without any obstructions.
- Set the camera on its side (So the body is vertical ), this will ensure you have as much content as possible from top to the bottom of the image.
- Take the first image
- Find you correct exposure factors
- If you are happy with the exposure and detail, continue to take multiple images as you turn 360 degrees with the tripod. Ensure with each image there is an overlap so Lightroom can know which images to sew together.


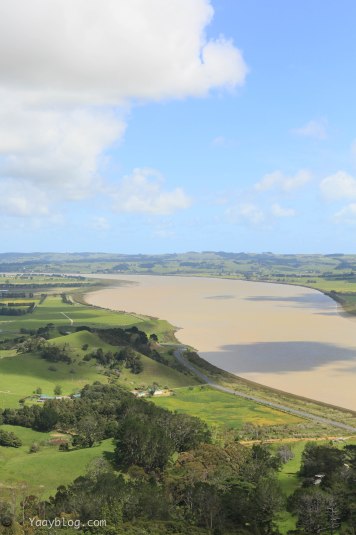
Example of three images with overlap so Lightroom knows which images join together.
Now for the Lightroom part:
- Import your images into Lightroom

- Click on Edit on the top bar and click on select all if you want all your images merged. If not, just select the images you want to merge.
- Once images have been selected, click on Photo on the top toolbar. Scroll down and click onto Photo merge and then onto Panorama.

- Lightroom will then automatically sew the images together
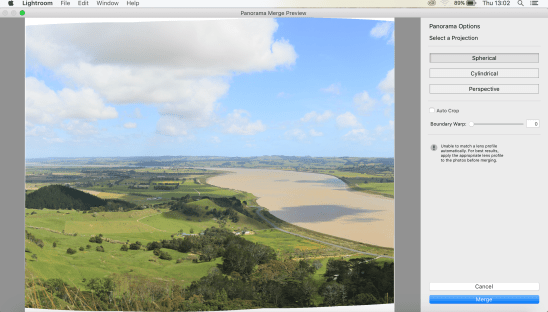
There are three panoramic formats for you to choose from:
Spherical: Aligns and transforms the images as if they were mapped to the inside of a sphere. This projection mode is great for really wide or multirow panoramas.
Perspective: Projects the panorama as if it were mapped to a flat surface. Since this mode keeps straight lines straight, it is great for architectural photography. Really wide panoramas may not work well with this mode due to excessive distortion near the edges of the resulting panorama.
Cylindrical: Projects the panorama as if it were mapped to the inside of a cylinder. This projection mode works really well for wide panoramas, but it also keeps vertical lines straight.
All of these projection modes work equally well for both horizontal and vertical panoramas. The format information was taken from. https://helpx.adobe.com/lightroom/help/panorama.html
There is then the option to allow the computer to automatically crop the image. You can also crop it yourself using the boundary wrap bar to stretch or compress the image to your liking.
Once you are happy with your overall image press “merge” to create an image. This image will then appear on the bottom bar with all your other images.

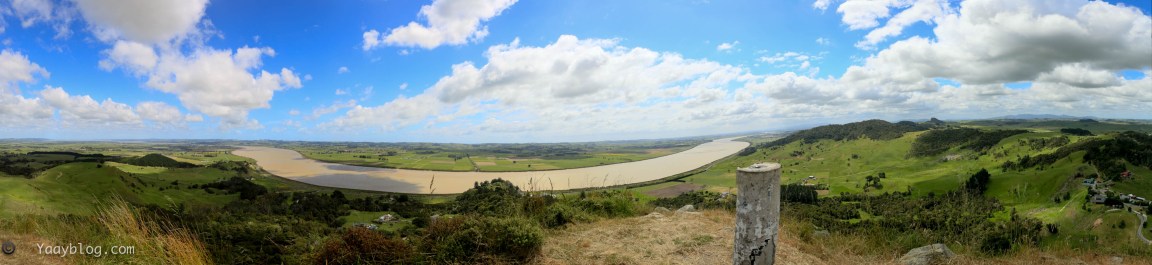
The more images you merge, the more dramatic the overall image and remember have fun with it. It’s simples! 🙂

